Follow Me On Social Media!


Kitchen Sink Cookies: The Ultimate Indulgent Treat You’ll Love
Introduction to Kitchen Sink Cookies
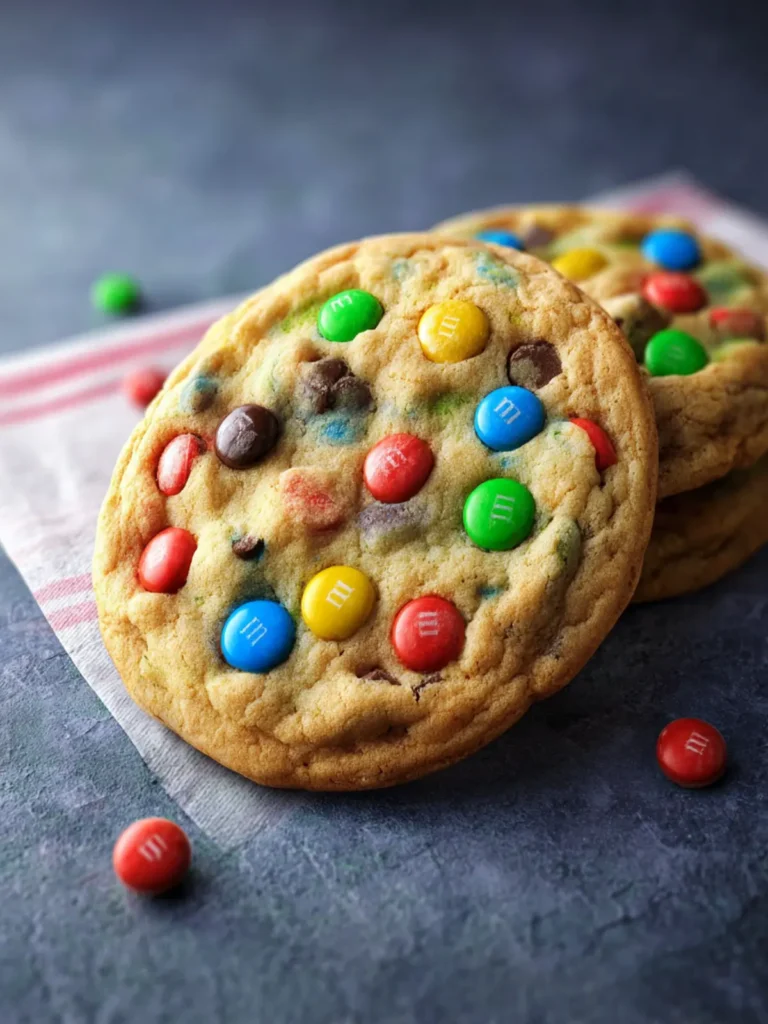
Imagine a cookie that encapsulates all your favorite treats in a single, delightful bite. That’s the magic of kitchen sink cookies! These cookies have become a beloved household favorite, transforming leftover pantry staples into a deliciously fun dessert. The idea is simple: throw in a little of this and a little of that, gathering flavors and textures into one extraordinary cookie. It’s a brilliant way to creatively use up what you have on hand while satisfying your sweet tooth.
What makes Kitchen Sink Cookies a delightful treat?
At their core, kitchen sink cookies are built on the principle of variety. Unlike traditional cookie recipes that stick to one or two main flavors, these cookies invite a whole cast of ingredients to the party. Here’s why they’re such a hit:
-
Flavor Explosion: With a mix of chocolate chips, nuts, dried fruits, and even a sprinkle of pretzels or potato chips, each bite bursts with different tastes and textures. It’s like a surprise party for your taste buds!
-
Customizable: Catering to your own preferences or dietary restrictions? No problem. Feel free to add or omit ingredients based on what you enjoy or have nearby. Are you a fan of coconut? Toss some in. Or perhaps you love a fruity twist? Dried cranberries can do the trick!
-
Nostalgia in Every Bite: These cookies remind many of the homey feel of baking with family. Each batch often has its own unique twist, created through shared memories and spontaneous choices, making them a perfect weekend baking project.
-
Wholesome Goodness: While they may have a playful demeanor, you can definitely sneak in wholesome ingredients like oats or whole wheat flour, balancing indulgence with nutritional benefits.
As you gather your ingredients and prepare to bake, remember that the joy of kitchen sink cookies lies not just in how they taste, but in the creativity and love you pour into them. So roll up your sleeves, and let’s get baking—those cookies aren’t going to make themselves!

Key Ingredients for Kitchen Sink Cookies
Creating delicious kitchen sink cookies is all about the perfect blend of ingredients. Each component plays a crucial role in crafting that perfect balance of flavor, texture, and—of course—richness.
-
Butter: I use unsalted butter to achieve a creamy texture that melds beautifully with the sugar. It’s essential for giving those cookies a rich and mouthwatering taste.
-
Sugars: A mix of brown and granulated sugar is key. Brown sugar adds moisture and chewiness, while granulated sugar helps in achieving that crisp edge.
-
Eggs: Using one large egg helps bind all the ingredients together, providing structure without making the cookies too dense.
-
Vanilla Extract: A splash of pure vanilla extract elevates the flavor profile, making each bite irresistible.
-
Flour: All-purpose flour is my go-to, contributing to the perfect crumb. It offers the right consistency that allows those cookies to hold all the delicious mix-ins.
-
Baking Soda and Salt: These are vital; baking soda helps the cookies rise, while a pinch of salt amplifies the flavors, balancing sweetness beautifully.
-
Mix-Ins: Here’s where the magic happens! From chocolate chips to nuts, pretzels, and dried fruit, the kitchen sink cookies are customizable and ensure every bite is a surprise.
Why You’ll Love Kitchen Sink Cookies
Imagine pulling a warm batch of kitchen sink cookies from the oven, the enticing aroma wafting through your home, igniting memories of cozy afternoons spent baking with loved ones. These cookies embody the spirit of improvisation in baking, inviting you to toss in whatever odds and ends you have on hand.
Here are some reasons you’ll fall head over heels for kitchen sink cookies:
-
Ultimate Customization: These cookies thrive on variety! Got leftover chocolate chips? Toss them in. Some nuts lingering in your pantry? Perfect. Whether it’s dried fruits, pretzels, or cereal, the possibilities are endless. You can turn each batch into a unique masterpiece that reflects your taste.
-
A Chewy, Gooey Delight: Sink your teeth into these cookies, and you’ll be met with a perfect blend of textures. The combination of different ingredients—nuts, chocolate, and oats (if you choose to add them)—creates a mouthwatering contrast that keeps each bite exciting.
-
Great for Sharing: Whether it’s a casual gathering, a last-minute gift, or simply to brighten someone’s day, these cookies are sure to please a crowd. Everyone loves the delightful surprise of flavors and textures packed into each cookie.
With all these attributes, it’s no wonder that kitchen sink cookies find a special place in the hearts of bakers everywhere. So roll up your sleeves and dive into this delightful mix of flavors!

Variations of Kitchen Sink Cookies
When it comes to kitchen sink cookies, the beauty lies in their versatility. They can be tailored to fit your mood or the ingredients you have on hand, creating a unique adventure for your taste buds with every batch. Whether you’re feeling indulgent or health-conscious, you’ll never run out of options!
Nutty Delight
For a delightful crunch, consider adding chopped nuts such as walnuts or pecans. Not only do they add texture, but they also lend a heartiness that contrasts wonderfully with chocolate. If you’re a fan of almonds, sliced almonds can bring a lovely nuttiness that complements the sweetness.
Dried Fruits
Mixing in dried fruits like cranberries, apricots, or raisins can elevate your kitchen sink cookies to a new level. The tartness of cranberries, for instance, can cut through the sweetness, providing a balanced flavor profile, while apricots can infuse a subtle floral note.
Different Chocolates
Why not explore the world of chocolate? Instead of just semisweet chips, try milk chocolate or dark chocolate chunks. These variations can dramatically transform the cookie experience, offering a range of flavors from rich and deep to creamy and sweet.
Flavor Enhancements
Spices like cinnamon or ginger can add an unexpected twist to your cookies. A sprinkle of sea salt on top just before baking can enhance the sweetness and create a delightful contrast that you’ll crave.
These variations make kitchen sink cookies not just a recipe, but a canvas for creativity in your baking adventures. What will you choose for your next batch?
Cooking Tips and Notes for Kitchen Sink Cookies
Baking kitchen sink cookies is less about sticking to a strict recipe and more about embracing creativity. Imagine the homely aroma wafting from your oven as you combine all your favorite treats into one delicious creation. So, let’s dig into some helpful tips to ensure your cookies turn out perfectly.
Choose Your Mix-Ins Carefully
The beauty of kitchen sink cookies lies in their versatility. You can mix and match your favorite ingredients. Consider incorporating:
- Chocolate chips (dark, milk, or white) for that sweet richness.
- Nuts like walnuts or pecans to add a delightful crunch.
- Dried fruits such as cranberries or raisins for a chewy texture.
Don’t Skip the Chilling
After mixing your dough, consider chilling it for at least 30 minutes. This step helps the flavors meld while preventing your cookies from spreading too much during baking. A little patience here goes a long way!
Baking Time and Temperature
Every oven is different! Start by baking your kitchen sink cookies at 350°F (175°C) for 10-12 minutes, keeping an eye on them. You want the edges golden but the centers slightly underbaked; they will continue to cook as they cool.
Store for Freshness
To keep your cookies soft and fresh longer, store them in an airtight container at room temperature. For added longevity, you can freeze them, providing a treat whenever you need a quick pick-me-up!
Keep these tips in mind, and you’ll be well on your way to creating irresistible kitchen sink cookies that friends and family will adore!
Serving Suggestions for Kitchen Sink Cookies
There’s something undeniably comforting about kitchen sink cookies, as they invite spontaneity and creativity right into your baking routine. Imagine come home from a long day, and the aroma of freshly baked cookies fills the air—what a delightful end to your day!
Pair with a Refreshing Beverage
To elevate your cookie experience, consider pairing your kitchen sink cookies with a chilled glass of milk or a warm cup of coffee. The rich textures and flavors in the cookies balance beautifully with the creaminess of milk or the robust notes of coffee, creating a delightful contrast.
Serving for a Crowd
Planning a get-together? Cut your cookies into smaller bite-sized pieces to offer more variety while allowing guests to sample all the delicious mix-ins. Additionally, arrange them on a bright platter and add some fresh fruit or a decorative touch with edible flowers for a visually appealing treat.
Perfect for Any Occasion
These kitchen sink cookies are incredibly versatile, making them suitable for any occasion—from casual movie nights to festive holiday gatherings. Consider wrapping a few cookies in parchment paper and tying them with twine as thoughtful gifts for friends or coworkers.
Storage Tips
If you manage to have leftovers (which may be unlikely!), store your cookies in an airtight container at room temperature. This helps maintain their chewy goodness and ensures they stay fresh for days. Enjoy every moment as you share and savor these delightful creations!
Time Breakdown for Kitchen Sink Cookies
Creating the perfect batch of kitchen sink cookies is as much about the timing as it is about the ingredients. Let’s walk through the process to help you manage your time efficiently.
Preparation Time
Getting your ingredients together and mixing them up is a breeze. You’ll need about 15 minutes to prep your kitchen sink cookies. Gather your mix-ins, from chocolate chips to nuts, to ensure a perfectly delicious cookie.
Baking Time
Once your dough is ready, pop it in the oven. The baking will take approximately 12-15 minutes. Keep an eye on those cookies; you want them golden brown!
Cooling Time
Patience is key! Allow your cookies to cool on the baking sheet for about 5 minutes before transferring them to a wire rack. This helps them firm up beautifully without falling apart.
Total Time
From prep to enjoying that first bite, you’re looking at around 30-35 minutes. It’s a swift yet rewarding process for such scrumptious kitchen sink cookies!
Nutritional Facts for Kitchen Sink Cookies
Understanding the nutritional profile of kitchen sink cookies not only helps with mindful indulgence but enhances enjoyment when you know just what you’re savoring. These cookies are a delightful blend of flavors and textures, making them a favorite for any occasion. Here’s a breakdown of the key nutritional facts:
Calories
Each serving of kitchen sink cookies delivers approximately 150 calories. This makes them a sweet treat without completely derailing your daily nutrition.
Protein
Packed with roughly 3 grams of protein, these cookies provide a small boost, thanks to the mix of ingredients like oats, nuts, and chocolate chips.
Sugar Content
With about 10 grams of sugar per cookie, you’ll satisfy those sweet cravings while being aware of how it fits into your overall dietary goals.
Indulge in your kitchen sink cookies knowing both the joy they bring and what goes into making them!
FAQs about Kitchen Sink Cookies
What are Kitchen Sink Cookies?
Kitchen sink cookies are the embodiment of a delightful baking free-for-all, where you toss in a bit of everything you love. Imagine soft and chewy cookies filled to the brim with chocolate chips, nuts, dried fruits, and any other treat you can think of. They are called kitchen sink cookies because you essentially throw in all the leftover ingredients from your pantry—just like you would throw in the kitchen sink!
How can I customize these cookies?
Customization is where the fun begins with kitchen sink cookies! Here are some ideas to tailor them to your taste:
- Mix-ins: Try different chocolates, like white, dark, or even peanut butter chips.
- Nuts: Walnuts, pecans, or pistachios can add a delightful crunch.
- Fruits: Dried cranberries, apricots, or even banana chips work wonders.
- Spices: Add cinnamon or nutmeg for a warm, cozy flavor.
Can I freeze Kitchen Sink Cookies?
Absolutely! Kitchen sink cookies freeze wonderfully. You can freeze the dough before baking or freeze the baked cookies. To freeze the dough, scoop portions onto a baking sheet and freeze them until solid. Then transfer them to a freezer bag. When you’re ready, bake them from frozen—just add a couple of extra minutes to the baking time.
What’s the best way to store them?
To keep your kitchen sink cookies fresh:
- Room Temperature: Store them in an airtight container at room temperature for up to a week.
- Refrigeration: For longer-lasting freshness, you can refrigerate them. Just make sure they’re well wrapped to prevent drying out.
No matter how you store them, these cookies will surely remain the ultimate treat!
Conclusion on Kitchen Sink Cookies
The magic of kitchen sink cookies lies in their delightful chaos. By combining an assortment of ingredients, you create a uniquely flavorful cookie experience that’s sure to please everyone. Whether you go for the classic chocolate chips or throw in some unexpected add-ins like pretzels or toffee bits, these cookies are a blank canvas for your creativity. They’re perfect for sharing at gatherings or simply enjoying during a cozy night in. So why not whip up a batch today and let each bite bring a comforting, nostalgic warmth? Your taste buds will thank you for it!
Print
Chocolate Pretzel Cookies
- Total Time: 26 minutes
- Yield: 24 cookies 1x
- Diet: Vegetarian
Description
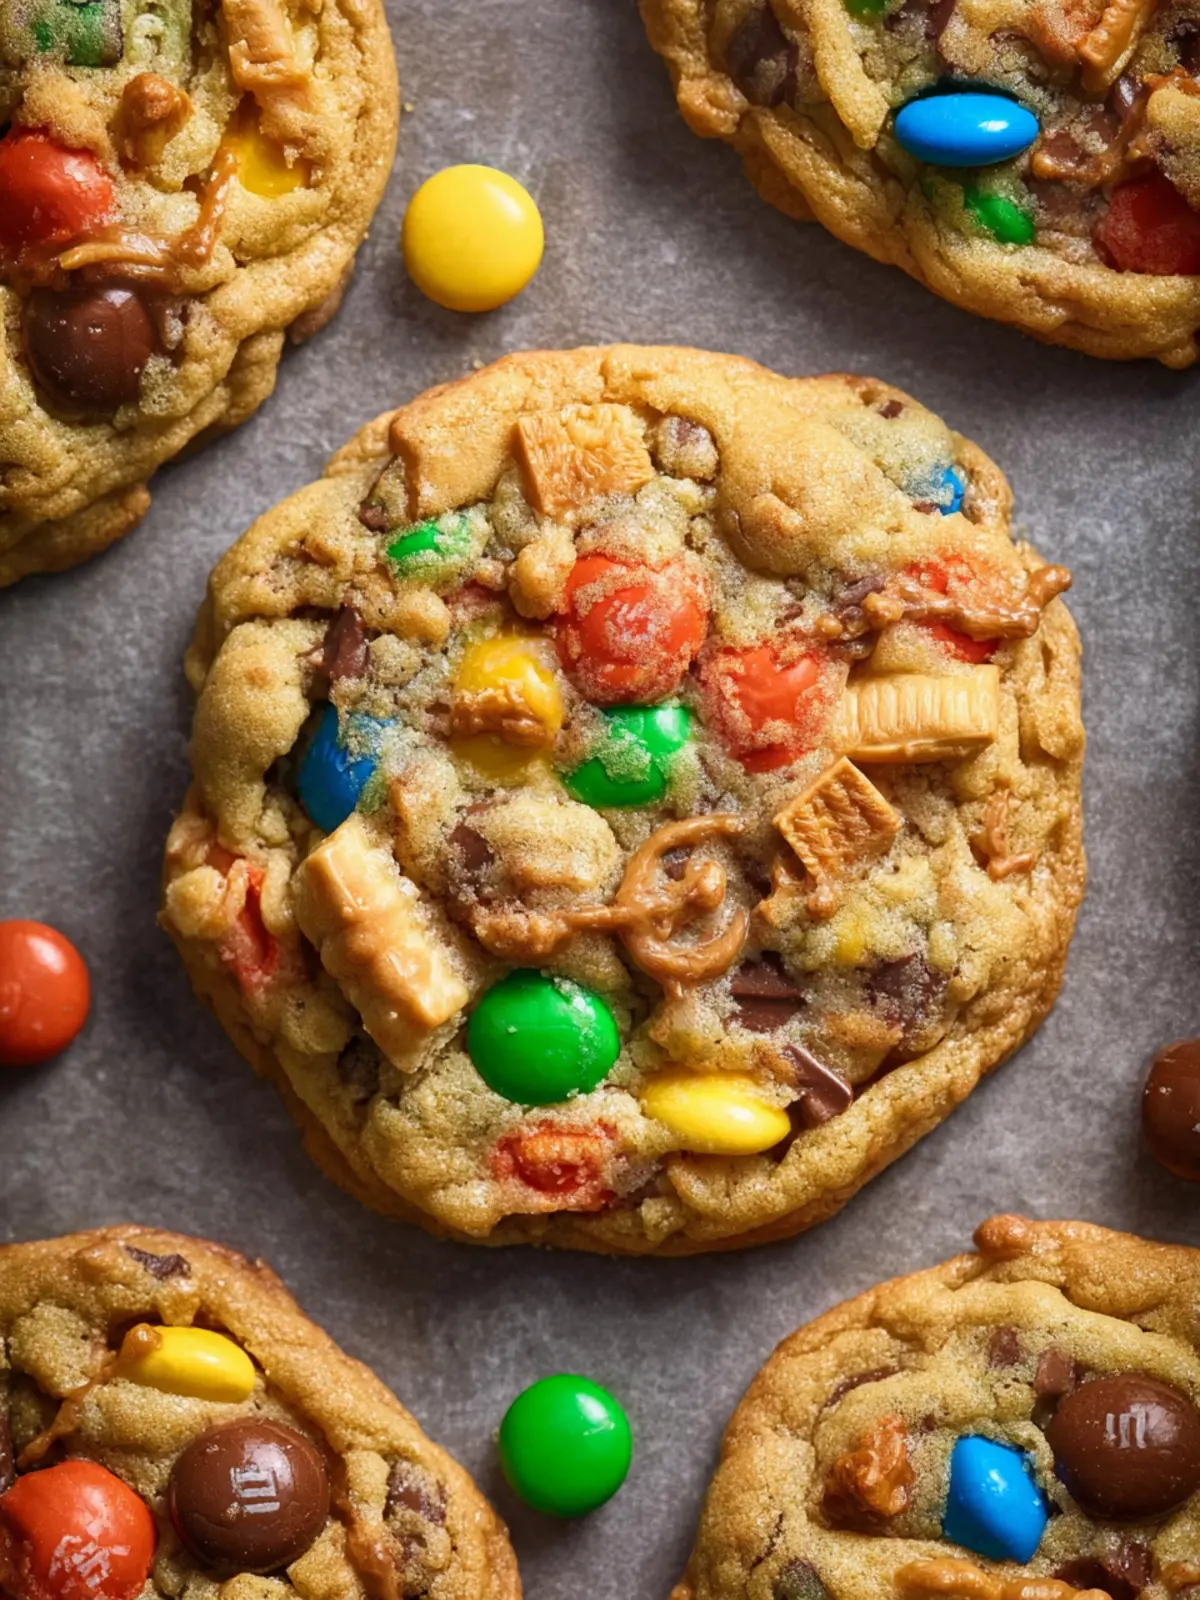
Delicious chocolate cookies loaded with M&M’s, chocolate toffee chunks, and pretzels for a sweet and salty treat.
Ingredients
Scale
- 1 cup Butter (softened)
- 1 cup Brown Sugar
- 3/4 cup Sugar
- 2 large Eggs
- 1 teaspoon Vanilla Extract
- 2 3/4 cups Flour
- 1 teaspoon Baking Soda
- 1/2 teaspoon Salt (if using unsalted butter, increase to 3/4–1 tsp)
- 1 cup M&M’s (mini or regular)
- 3/4 cup Chocolate Toffee Chunks (Heath bars, chopped into pieces)
- 1 cup Pretzels
- 1/2 to 3/4 cup Butterscotch, Peanut Butter, or Caramel Chips
- 1/2 cup Semi-Sweet Chocolate Chips
- Optional: Reeses Pieces, potato chips, caramel bits, Reeses peanut butter cups
Instructions
- Preheat your oven to 375 degrees and line baking sheets with parchment paper. I suggest using light colored baking sheets.
- In a large bowl, beat together softened butter, brown sugar, and sugar until light and fluffy, about 3-4 minutes, scraping the sides of the bowl halfway through.
- Add eggs, one at a time, beating well after each addition. Mix in vanilla extract.
- Fold in flour, baking soda, and salt. Mix just until combined.
- Set aside a small amount of the mix-ins to place on top of the cookies once they are baked. Gently fold in M&M’s, pretzels, chocolate toffee chunks, butterscotch, caramel or peanut butter chips, and chocolate chips. Don’t overmix to avoid breaking down the mix-ins too much.
- Scoop about 3-ounce portions of cookie dough onto the prepared baking sheets, spacing them at least 2 inches apart.
- Bake for 9-11 minutes, or until the edges are lightly golden and the centers look slightly underbaked.
- As soon as the cookies come out of the oven, use a small spatula or the back of a spoon to gently nudge the edges into a perfect circle while they’re still warm and pliable. Press a few extra M&M’s, pretzel pieces, chocolate chips, and toffee chunks into the tops for gourmet cookies.
- Let the cookies cool on the baking sheet for 5 minutes before transferring them to a wire rack to cool completely.
Notes
- For a richer flavor, consider using dark brown sugar instead of light brown sugar.
- You can mix and match the types of chips and candies used in the recipe.
- Store cookies in an airtight container at room temperature for up to 1 week.
- Prep Time: 15 minutes
- Cook Time: 11 minutes
- Category: Dessert
- Method: Baking
- Cuisine: American
Nutrition
- Serving Size: 1 cookie
- Calories: 180
- Sugar: 12g
- Sodium: 100mg
- Fat: 7g
- Saturated Fat: 4g
- Unsaturated Fat: 2g
- Trans Fat: 0g
- Carbohydrates: 25g
- Fiber: 1g
- Protein: 2g
- Cholesterol: 30mg